Monday, November 5, 2012

Resolving "New XAMPP security concept" issue and opening phpMyAdmin console

Environment : Ubuntu 12.04 (Linux)

I was going to open the phpMyAdmin console after starting XAMPP server 1.8.1 where i was greeted with the following error message :D


Eventhough i was first confused, resolving this issue was not hard after having some web search. This is how to get it done.

As the error message informs first we have to find "httpd-xampp.conf" file. It is in the /opt/lampp/etc/extra directory. Open this file with root permission as we are going to edit it.

Note: /opt/lampp is the installation folder where i installed my XAMPP distribution. If you have installed it in another location go there and get into LAMPP_HOME/etc/extra directory.

Find the following section in the file.
<Directory "/opt/lampp/phpmyadmin">
  AllowOverride AuthConfig Limit
  Order allow,deny
  Allow from all
</Directory>

The error can be fixed by adding the following line in within the <Directory> tags.

Require all granted

So the edited section would look like,
<Directory "/opt/lampp/phpmyadmin">
  AllowOverride AuthConfig Limit
  Order allow,deny
  Allow from all
  Require all granted
</Directory>

Now click on phpMyAdmin link, the console will be opened now.


How to install XAMPP correctly in Linux (Ubuntu 12.04)


When you want to install Apache 2.0 server to try and test your services in the local computer, Apache XAMPP is an easy and straightforward solution which comes with combined MySQL and PHP packages.  Following is what you should do to install and run XAMPP in your computer.

1. Download latest version(or an older version if you need) of XAMPP from the 'XAMPP for Linux' page.

2. Use the following command and extract the downloaded distribution into /opt directory.

               sudo tar xvfz xampp-linux-1.8.1.tar.gz  -C /opt

You can replace xampp-linux-1.8.1.tar.gz with the version you have.

3. This will extract the content of XAMPP directory into /opt/lampp/. Now let's start the XAMPP server. Use the following command.
  
               sudo /opt/lampp/lampp start 

If all the configurations are correct XAMPP server will start now as follows.

Starting XAMPP for Linux 1.8.1...
XAMPP: Starting Apache with SSL (and PHP5)...
XAMPP: Starting MySQL...
XAMPP: Starting ProFTPD...
XAMPP for Linux started.


 4. Goto http://localhost from your browser and test whether this is correctly installed and started. You will be first directed to the language selection page and then the welcome page would be appeared as shown below.

XAMPP welcome page
 
 5. Stop the server when you are done :)


               sudo /opt/lampp/lampp stop 

 ...................................................................................................................................................

If everything goes fine as this you are good to go. However there may be times when you get error messages like this.

Starting XAMPP for Linux 1.8.1...
XAMPP: Starting Apache with SSL (and PHP5)...
XAMPP: Another MySQL daemon is already running.
XAMPP: Starting ProFTPD...
XAMPP for Linux started.


What this means is that XAMPP-MySQL is not started as you have another mysql-server instance is running in your local computer. Most probably you may have installed mysql-server-5.0 (or older version) previously into your computer. Therefore to start MySQL in XAMPP distribution we have to first stop this service. Use the following command.

            sudo service mysql stop  

The running mysql service will be stopped. Simple start the XAMPP server back and problem is fixed now :) Do the same and stop the apache2 service if you see that Apache server too hasn't started.

XAMPP: Another web server daemon is already running.
Use,     sudo service apache2 stop 


Monday, October 29, 2012

OpenMRS Html Form Entry Module new features

The HTML Form Entry module gets new features with each and every new version of release to provide more functionalities to he users. The following is a simple note on the new features i was working on HFE module last few months.

1. HTML-348 : Allow checkbox styles for numeric observations

Earlier if a user need to enter numeric observations like numbers,quantities etc. there were only text boxes, drop down lists and radio buttons used in order to do it. With the new addition you can use checkboxes also to record numerical observations as well as to capture multiple numerical observations.

An example code segment in a form would be,

<obs conceptId="5497" answer="502" answerLabel="502" style="checkbox"/>
<obs conceptId="5497" answer="503" answerLabel="503" style="checkbox"/>
<obs conceptId="5497" answer="504" answerLabel="504" style="checkbox"/>

where it would generate this kind of a form as shown below.


2. HTML-92 : Handle checkbox style (multiple select) in single obs element


At past if a user needs to add two or more checkboxes as answers for a question concept it was needed to be defined one by one per each checkbox element as shown below.

<obs conceptId="1069" answerConceptId="664" answerLabel="No Complaints" style="checkbox" />
<obs conceptId="1069" answerConceptId="832" answerLabel="Weight Loss" style="checkbox" />
<obs conceptId="1069" answerConceptId="6029" answerLabel="Night Sweats" style="checkbox" />

However this is a tedious and time wasting job for the form designed therefore this new feature is added in order to provide the ability to define all the checkbox elements in a single tag definition.

The following is the format of how the new <repeat with=""> tag should be added in the html form.

<repeat with="[664,'No Complaints'], [832,'Weight Loss'],[5544,'Weight Gain']">
<obs conceptId="1069" answerConceptId="{0}" answerLabel="{1}" style="checkbox" />
</repeat>

An example form with multiple checkbox elements is as follows.


A week in Philliphines with OpenMRS Implementers Meeting- part 2

Day 3 and 4 .........

Apart from the normal sessions there was the group photo taking on Wednesday evening. All the crowd gathered for the event and we were chatting with each other till the place is set for the group photo. 

Group Photo

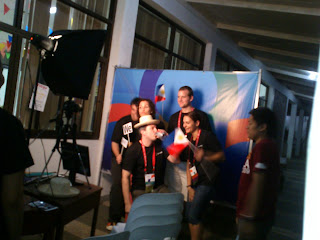
There was also a photo booth where we could simply go and take photos as we want, and the photos were given to us printed in the next day. Everybody was eager to take some funny pictures with their friends etc. so it was very funny to watch :D 


The Thursday was entirely dedicated to site visits. By the time we arrived near the YBS Hall there were two buses waiting there for us, getting ready to take us to the town. The breakfast was arranged in packets so i grabbed one of them and got into bus to find a good seat to have a nice town view :)

The buses waiting to take us to the site visits


All of us were divided into 7 groups and taken into 7 different healthcare centers. I was a part of the team who visited “Toro Hills Sentrong Sigla” health center in Quezon City. The clinics had been started by the time we went there and, it was the child vaccination day in the center. 


The doctor explained us how they use an OpenMRS based recording system to keep track of the patient data. It was a nice experience to get a live demo on the application.


Apart from learning through sessions and meeting the fellow community,   OMRS12 was a fun filled event too. We were greeted with a great Philippine music session at the restaurant after the site visits as well as there was a wonderful entertainment session at night right after the dinner. Therefore the days were not only for work but they were giving us the opportunity to experience the Philippines culture too.

Now recalling those precious memories from the Implementers Meeting, it feels like that was the best experience I have got in working with any of the projects in my life so far. When I first started GSoC I never thought that I will be able to go this much further with OpenMRS. But as now I have been able to learn whole lot of new things and what are the newly emerging works in OpenMRS and, more importantly I was able to meet a great bunch of people who are so friendly and supportive towards each other, called OpenMRS community. I felt really proud to be a part of them and looking forward to continue my journey with them. So this is most probably not an end but just a beginning :)

A week in Philliphines with OpenMRS Implementers Meeting 2012

There was one month had been passed after the GSoC 2012 programme had officially ended, where i completed my project, HTML FormEntry module with the guidance of my mentor Mark Goodrich, and i was informed about a real surprise. It is from the OpenMRS mailing list that I first saw that they are willing to offer a limited amount of scholarships for those who are interested to be in the OpenMRS Implementers Meeting this year in Silang, Cavite, Philippines. Michael who is our GSoC coordinator, had also sent a specific mail to the interns’ mailing list, highlighting that we as student developers can also attend to this meeting. The first thing I did after that was searching for information on meetings in previous years and, after reading about that past stories I was really excitingly wishing that how great it would be if i too can attend :) Therefore i  applied for the scholarship mentioning my contribution so far and what i would like to do in future.

And yeah, I got selected! At first I couldn’t believe my eyes reading the scholarship mail. Ever since then I was counting my days to be in Philippines to meet all the people I have known from IRC, mailing lists and to learn about how the development work we do are used in real world applications and, especially to meet two of my fellow GSoC friends Jordan and Harsha who were also supposed to attend.

As this was my first out of country I was pretty nervous about managing everything on my own in a different country. But thanks to Dawn, Michael from organizing committee and Ana in the host committee, everything was well arranged. As soon as we landed in Manila we were picked up by a guide, driven to the IIRR (International Institution of Rural Reconstruction, which is the meeting venue) and then guided straight to our accommodation area too. Ellen, my roommate who was from PIH (Partners in Health) was a great companion, she helped me a lot to get familiar with everything around.

Day 1 and 2 .......

At 9th Tuesday morning after the breakfast, we all were there for the opening ceremony and the roadmap of OpenMRS as well as the current state of OpenMRS is explained by Dr. Paul Biondich and Dr. Burke Mamlin, who are the co-founders of OpenMRS.  The first two days of the meeting was filled with lot of unconference sessions where there were three sessions happened parallel and we were given chance to attend whatever the session important and interested to us. 

Just before the commencement of Opening Ceremony

Right after the opening ceremony everybody was invited to join on expressing themselves about the things they would like to be discussed here. I was very amazed to see that how eagerly everybody participated in doing this, without a single forcing, almost all people just volunteered to say what they willing to know during next few days. Within few minutes there are a whole lot of ideas and we were out there, arranging each topic under session slots and deciding who will lead the session.


Helping with making the Conference schedule
There were lot of interesting topics and I was bit worried that there are more than one interested session happens at the same time, because as a newbie I saw a lot value in each topic for me.

The sessions were very much informal where everyone interested were welcome to join. We gathered around and listened to the speakers to know what they say, while everyone expressing their ideas and asking questions in middle. I did like the nature of the sessions a lot as it was easy to join and learn things in this way than being in a big formal talk.

I was able to learn lot of new things by attending the sessions. As I have only involved in coding, I didn’t have a clear idea on how our code is customized and used in real applications in large scale. From listening to various speakers in their sessions, I learnt that how they use OpenMRS in Kenya, Rwanda, Philippines, Malawi, Israel India, Pakistan, Haiti and a few more countries. They were giving out details as how many centers in each country, what modules they use, how many patient entries in database etc. I was very happy to hear that HFE module in which I am working is being used widely with lot of implementations.


Unconference Sessions
There were many different sessions and various informal chats (BoF sessions, lightening talks) happening throughout the meeting. I found lightening talks were very interesting where each person was giving five minute presentation of a topic of his/her choice. It was a good way to get quick introductions on many things.


Lightening Talks


So that is how the first few days went. My next post will be on the remaining days which were the best days of the meeting :) 

To be continued.................

Down the lane with OpenMRS in GSoC 2012-Part III

It has been months after the GSoC 2012 finished and finally i managed to find time to write on the remaining tasks i did with my project :D Since it has been three months gone all the improvements can be found with the latest releases of HFE module. 

3. HTML-247 : Exit from care tag

Another newly created tag to the module tags list which is used to record the scenario when a patient exits care center. It operates in a similar manner to the exit from care functionality on the patient dashboard, providing a date field  and a reason dropdown to the user. Exiting a patient from care is not mandatory, however once the fields are filled out and submitted for a certain patient, the exit can't be undone, hence the fields can't be set back to empty. However it is possible to edit the date and reason fields.The possible reasons for exiting care are specified by setting the global property concept.reasonExitedCare. This should point to a question concept; the associated answer concepts will be used to populate the reason dropdown presented to the user.
  • To exit a patient from care, the date field should be set to the date of the patient's exit and the reason dropdown set to the reason for the patient's exit selected from the list of given reasons.
If the patient is dead, the tag can be also used to mark a patient's death, by recording the cause of death in the additional dropdown that pops up. The user needs to select the reason dropdown answer as "Patient Died", then a new dropdown will be visible for the user to enter the 'Cause of Death'. The possible causes for patient's death are specified by setting the global property concept.causeOfDeath. This should point to a question concept; the associated answer concepts will be used to populate the cause of death dropdown presented to the user.
  • To mark a patient as dead, the reason field should be set to Patient Died and the cause of death dropdown set to the cause for the death selected from the list of given causes.
If the exact cause is not given in the cause dropdown,  select the 'Cause of Death' dropdown answer as "Other Non-coded", as there will be another text field visible to manually enter the reason for the death. Here the user can type any of the reason,description etc. which caused the patient's death. 
Once the cause of death and other reason text fields are filled out and submitted for a certain patient, the death obs can't be undone. However it is possible to change the reason for exit field back to an answer other than "Patient Died", so the exit observation can be edited back. Then it will not display the death fields' entries but the death obs still exists. It is also possible to edit the cause of death and other reason fields too.

If things are not clear yet, here is a snapshot of what you can have with the <exitFromCare> tag.

 Go to the wiki page description from here.

So this was the end of my awesome GSoC time period with OpenMRS. The following is the complete project page of 'HTML FormEntry Module Enhancements' and the link for the final video demonstration is given below.

Final Demonstration Video : http://www.youtube.com/watch?v=u6pdK1J1oxk

Actually we were planning to work on few more tasks during this summer but had to halt one unfortuantely due to time constraints. Anyway this will not just be the end, though the GSoC ended neither did my contribution and engagements with OpenMRS :) More on them in the coming posts.....!

Tuesday, July 3, 2012

OpenMRS GSoC Project Introduction - my first online presentation

Just after the coding period began in GSoC, we in OpenMRS had our introduction presentations where each of the GSoC participant had to give a brief 10 minute introduction regarding our projects at the weekly OpenMRS Developers Forum. Since this was my first time, doing such kind of online presentation for an audience i was bit uncomfortable regarding this as well as excited too. However my mentor Mark was very helpful and he helped me to correct the content i am going to present, the things i am going to say etc.

There are few ways to connect to the Developers forum as Skype, Adobe Connect etc. and i was using Adobe Connect. Therefore it was not very hard to configure the settings where i did prechecking of my microphone,speakers etc. before the meeting and also before the meeting starts, some of us did test our microphones with voice. My slot was the last presentation of the schedule so by that time my fears were all gone and i was well relaxed. :D That is one remarkable experience in my GSoC memories and presenting my project into a new audience was really a great experience, as well as the support and help we got from the fellow OpenMRS community members!

I have also attached the slide i used to do the presentation, as there was specific information which needed to be mentioned there. Perhaps a future OpenMRS GSoC student may find it useful :)


Down the lane with OpenMRS in GSoC 2012-Part II

The next task i was assigned is,

2. Creating a new tag to restrict all (or part of) an HTML Form by role 


The <restrictByRole> tag is the next newcomer to the HTML tag base of Form Entry Module. This feature is concerned to be implemented in a way that, some user with a particular role can be restricted from either viewing a certain HTML form (or a section in the form) by using the <restrictByRole> tag. The tag comes with two attributes as "include" and "exclude" where you can mention the names of the roles for whom you want to include or exclude the form restriction.

As an example if you don't need to make a certain table in your HTML form to be viewable to a Person which has "Data Manager" role assigned to him/her, you form description would be as follows,

<restrictByRole include="Data Manager">                   
  <table>

   <tr>
       <obs conceptId="6100" labelText="Restricted for Data Manager"/>
   </tr>

  </table>
</restrictByRole>


So this table would not be shown to any person with the 'Data Manager' role but only to the users who belongs to that role.
In the same way this can be used with "exclude" attribute, in where the corresponding section would only be not restricted to the mentioned role.

An example form would be like,

1.0 These rows in the table are not restricted for the user Admin, who has "System Developer" role
2.0 If a user who is not a "System Developer" opens the form, if would look like this
That is where we are heading towards at the moment. There are two more tasks to do during the summer so i look forward for those also very enthusiastically!

Down the lane with OpenMRS in GSoC 2012 ..............

Time flows lot faster and i can't believe that it has almost come up the time for GSoC mid evaluations too.  I did have a quite busy but amazing time of two months so far with GSoC where it helped me to learn about many new things and technologies. So thought to have a little flashback on the things done so far.

The following are the tasks which i have already finished by the time of mid evaluation for this GSoC with HTML Form Entry module in OpenMRS.
1. Add autocomplete search functionality to encounter provider and encounter location widgets in HTML Form Entry
There are a lot of names as locations and encounter provider persons  in the system where it is displayed in a drop down list of options at the current module, but due to the long list of options it will be time taking to load and submit the location and provider values with the HTML form. 
At present, HFE module provides auto complete functionality with the <obs> tag, (stands for observation entries), where it does follows the JQuery AJAX calls to populate the source for the auto complete. However this feature is tightly coupled for Concept classes and ids, therefore it is not reusable for the Locations and Providers. The intention of my task is providing a generalized auto complete mechanism through out the module, which uses a pre-populated list of options as the source and which can be used with any other field (as DrugOrder etc.) in the future too. 
Encounter location and provider have been implemented by having two dedicated widgets for each such as, LocationWidget (for <encounterLocation>) and PersonStubWidget (for <encounterProvider>) tags. In addtion to that there is another encounter provider is introduced with htmlformentry 1.9 onwards which too uses a dedicated widget named ProviderWidget with <encounterProviderAndRole> tag. The intention of the task is replace the dedicated  widgets for location, provider etc. and implement a common auto complete mechanism over the Html Form Entry module by just using AutoCompleteWidget and the DropDownWidget for the fields. In that case when a user needs to add auto complete functionality into any other field, it can be easily done by using the new, generalized AutoCompleteWidget.
Here are few of the snapshots from new functionality!


And also it works with Options which has special characters like ã,é etc. and which have double quotes,single quotes in middle too :) Auto complete functionality is added into <encounterLocation>, <encounterProvider> and <encounterProviderAndRole> usingthe new AutocompleteWidget and LocationWidget and ProviderWidget in the module is replaced with the new AutocompleteWidget or a default DropDownWidget, hence they have been deprecated for future occurrences. 
The following is the link for the demonstration video i did regarding this new functionality at the second GSoC progress presentation at OpenMRS on 21st June 2012. The next post will explain the second task i have completed. I am eagerly waiting to see my changes have been integrated into HFE module soon :)
GSoC 2012 Autocomplete Demo
The presentation slides can be found Here!

Friday, May 11, 2012

Working with databases in mysql

The following is a brief tutorial on how to login to mysql shell from Linux (Ubuntu 11.10).

First of all mysql-server must be installed in your system. To enter the mysql commands from the shell we need to first change into mysql shell from the default unix shell window. To do this,

  • Find the mysql directory in your local computer. (by default this is /usr/bin if you installed mysql from the terminal via apt-get install). Now we need to get into mysql shell.
  • Enter the following command in a terminal window.
         $ [mysql-directory]/bin/mysql host -u root -p
  •  In my system this is,
          $ /usr/bin/mysql mydb_1 -u root -p where host is replaced by the corresponding database name i need to connect. This tells the system to connect the database as root by demanding the password (-p). Once you get connected the following text would appear and mysql shell would be opened.

Reading table information for completion of table and column names
You can turn off this feature to get a quicker startup with -A

Welcome to the MySQL monitor.  Commands end with ; or \g.
Your MySQL connection id is 151
Server version: 5.1.62-0ubuntu0.11.10.1 (Ubuntu)

Copyright (c) 2000, 2011, Oracle and/or its affiliates. All rights reserved.

Oracle is a registered trademark of Oracle Corporation and/or its
affiliates. Other names may be trademarks of their respective
owners.

Type 'help;' or '\h' for help. Type '\c' to clear the current input statement.

mysql>


Now we can enter any valid mysql command and proceed with database queries. Following are some of the common and important commands. Always keep in mind that each command must be finished with ; or \g

1. To view the 'help' entries
mysql> help;


2. To view the list of existing databases
mysql> show databases;

The output will be something like,
mysql> show databases \g
+------------------------------------+
 | Database                    |
+----------------------------------+
 | information_schema |
| mysql                        |
+-------------------------------+
2 rows in set (0.00 sec)


3. To create a new database
mysql> create database mynew_db;

4. To drop a database
mysql> drop database mynew_db;
The output will be like,
Query OK, 102 rows affected (23.71 sec)
 

5. To quit or exit from connection
mysql> exit; or  mysql> quit;


Monday, April 23, 2012

GSoC 2012, this summer with OpenMRS!

WoW after all the hard effort I got selected into Google Summer of Code 2012 to work with OpenMRS today. OpenMRS was the only organization i tried in this summer GSoC as i was so interested in the project as well as the support got from the community during the time of GSoC was awesome.


It was a bit struggling experience at the beginning as i had never worked with OpenMRS before so i was trying very hard in getting familiar with the project and catch up the speed. There were sometimes where i really felt to give up and pack off when i started fixing the first  ticket of the project. But anyway i never stopped trying and with a few days of killing myself (and also with great guidance got from community experts through IRC), i finally managed to understand the code a bit and could work in some introductory bugs. Life was much easier after that and it became more and more fun with the time going :) 

When going through the list my first interest was project HTML Form Entry Module Enhancements (to which i got selected at last, Yeppi :)). I felt a natural interest for that as i had formally worked with HTml,JSP etc. during my internship at WSO2 so immediately decided to begin OpenMRS with it :D. After contacting my mentor i could get some more information about the project and Mark, my mentor gave me some good  advice on how to begin and getting familiar with code. I first worked on an intro ticket with his guidance and when it was done moved onto other etc. It is really appreciated the guidance and support i got from my mentor Mark Goodrich, as he was very helpful towards me since from the beginning.

I applied for two projects in OpenMRS this summer "HTML Form Entry Module Enhancements" and "Personal Health Record Module Enhancements". I was looking forward to work in any of the two if i get selected but was extremely happy to know that i got my first choice project to work. 

"OpenMRS is a software platform and a reference application which enables design of a customized medical records system with no programming knowledge (although medical and systems analysis knowledge is required). It is a common platform upon which medical informatics efforts in developing countries can be built. The system is based on a conceptual database structure which is not dependent on the actual types of medical information required to be collected or on particular data collection forms and so can be customized for different uses." 

The HTML Form Entry module in OpenMRS allows one to create forms to enter and edit patient data within the system. The approach is very simple since user needs to know a little HTML and also about the basics of OpenMRS system. It allow users to write forms using standard HTML tags combined with a set of special tags that reference different aspects of the OpenMRS data model. The module has been improved a lot throughout the past, and my project is also to enhance the performance and feature support for the HTML Form Entry module.


Some tips for the future GSoCers  of OpenMRS from me.

  • It is never too late to start if you can commit hard and make a change. The main thing is trying your maximum and get something done, which will show the community that you are talented and committed too.
  • Join into mailing lists and IRC and discuss if you have trouble in proceeding with some point. From my experience i could solve in many issues after discussing it in IRC. Don't be hesitate to call for help :)
  • Read the documentation lot, it has almost everything regarding system and modules.
  • Try to fix at least few introductory bugs, it is the best way to get to know the code.
  • Contact your mentor, other community experts etc. in the need of a help.

That's all for now. But looking for more excitement to come in the next few days.

Happy GSoC to all my fellow OpenMRS interns as well as to others too!

Monday, March 26, 2012

Remote debugging maven jetty with IntelliJ Idea in Ubuntu 11.10

Jetty web server is an open source http server/client container which can be used to run and test webapps.  Jetty server provides a plugin to integrate with apache maven and it can be used to run a webapp in a maven project. To do this we need to add jetty-maven-plugin into our <plugins> section by adding it into webapp pom.xml file.

<plugin>
            <groupId>org.mortbay.jetty</groupId>
            <artifactId>maven-jetty-plugin</artifactId>
            <version>6.1.10</version>
            <configuration>
               <webXml>${project.build.directory}/jetty/WEB-INF/web.xml</webXml>
               <webAppConfig>
                  <contextPath>/${webapp.name}</contextPath>
                  <!--enable reloading static resources -->
                  <overrideDescriptor>src/test/resources/override-web.xml</overrideDescriptor>
               </webAppConfig>
               <scanIntervalSeconds>10</scanIntervalSeconds>
            </configuration>
         </plugin>


Now add the following Maven Options line into your .bashrc file.

For JDK 1.3 or above :
export MAVEN_OPTS="-Xdebug -Xrunjdwp:transport=dt_socket,server=y,suspend=n,address=8000"

For below JDK 1.3:
export MAVEN_OPTS="-Xnoagent -Djava.compiler=NONE -Xdebug -Xrunjdwp:transport=dt_socket,server=y,suspend=n,address=8000"

Goto the webapp folder from terminal and enter,
 mvn jetty:run
Jetty server will start on debug mode and will listen on port 8000 now. The following info will be appeared in terminal.


Goto IntelliJ Idea project and create a remote debug confiruation giving following parameters. (to do this follow the path Run --> Edit Configurations. Click on the + button followed by Remote and you will see remote configuration window appears)


Host = localhost
Port = 8000

Run the remote debug and it will also listen on port 8000 now.

Tuesday, March 6, 2012

Configuring proxy settings for Apache Maven

Ever wondered how to build your project with Apache Maven via a proxy server? This is a brief tutorial on how to do so.

Environment : Ubuntu 11.10 Oneiric
                        Apache maven 2.2.1

Apache maven holds all the configuration data in a single file called settings.xml file inside the 'conf' directory in the main directory of maven. The file includes configuration details regarding the proxies therefore we need to edit that section in order to enable the proxy server for a maven build.

This is how to do it.
  • Download the maven binary distribution from Apache Maven downloads page. The newest version is 3.0.4 however the stable version is 2.2.1 for the existing projects which are not upgraded into maven 3.
  • Extract the binary distribution into somewhere in your hard disk. apache-maven-2.2.1 directory will be visible now. Browse to the 'conf' directory inside 'apache-maven-2.2.1' main directory.
  • The 'settings.xml' file is inside the 'conf' directory. Open the file with a text editor and uncomment the section between <proxy> </proxy> tags. Edit the <proxy> entry as follows.
<proxies>
    <!-- proxy
     | Specification for one proxy, to be used in connecting to the network.
     | -->
    <proxy>
      <id>optional</id>
      <active>true</active>
      <protocol>http</protocol>
      <username>proxyuser</username>
      <password>proxypass</password>
      <host>MYHOST.LK</host>
      <port>3200</port>
      <nonProxyHosts>www.google.com|*.somewhere.com</nonProxyHosts>
    </proxy>
   
  </proxies>
  • Replace the MYHOST.LK address with the host address of your proxy server and replace the port number with relevant proxy port too. Save and close the file, now and you are ready to build via a proxy :)

Sunday, January 22, 2012

How to set up Apache Subversion to be accessed via a proxy (With Ubuntu))

I was going to access a subversion repository from my university network proxy for the first time and it was then that i realized that it is not possible with the usual subversion configuration. There are many options can be used in overcoming this  but the following simple solution worked for me very well.

Apache Subversion uses the 'servers' file to keep track of its' server configurations. If we need to use subversion through a proxy server the proxy-host and the port must be first configured in this file as it is not enabled by default. The simple steps to do this is;

1. We have to add the proxy server configuration into the 'servers' file in both locations.
  • /etc/subversion directory in our root directory 
  • .subversion directory in our home directory. 
However it would be sufficient only changing the 'servers' file in  .subversion directory to make this works.
2.However we can't edit the 'servers' file in etc/subversion directory since it demands root permission to edit it. So we have to open file as the root.
Open a terminal window by using ctrl+alt+T keys and enter the following command.

isha@pc:~$ sudo su
[sudo] password for isha: 

This will demand you for the password before providing root privileges.Enter the password and now we have root access in our computer. Go to the directory and open 'servers' file in text editor now.
root@isha-pc:/home/isha# cd /etc/subversion 
root@isha-pc:/etc/subversion# gedit servers
The 'servers' file will be opened now in the text editor. Look for the [global] settings section you will see some lines like this.

[global]
# http-proxy-exceptions = *.exception.com, www.internal-site.org
# http-proxy-host = my.proxy.domain.com
# http-proxy-port = 7000
# http-proxy-username = defaultusername
# http-proxy-password = defaultpassword

Change the 'http-proxy-host' with the address of your proxy server (excluding http:// part) and enter the port number into 'http-proxy-port' line. If you need edit the username and password settings too.

Important: Remove # symbol and all the spaces in front of the line you changed as additional spaces will result errors in the configuration. 

After editing it will look like,

[global]
# http-proxy-exceptions = *.exception.com, www.internal-site.org
http-proxy-host = my.proxy.lk
http-proxy-port = 3100

Save the file and close it.

3.We need to add the same configuration into the 'servers' file in .subversion directory. However it doesn't need root access to edit this file. Therefore open the file as a normal user and add the above details. Save and close.

4. Open a new terminal tab and access subversion repository back.

A useful thread to know additional options will be, svn-over-http-proxy

Saturday, January 21, 2012

Install Flash Player in Ubuntu 11.10 (Oneiric Ocelot)

Flash player is one of the first applications you install after installing your operating systems. Most online media applications requires flash player in order to run various animations,clips and programs, therefore this post is purposed on installing flash in Ubuntu 11.10.

There are three ways to install flash player in Ubuntu.
1. Downloading  flash player package from the Adobe website and manually installing it. Before downloading select the .tar.gz package in the selection box.

2. Installing flash player through Ubuntu Software Center.

3. Installing flash player from Synaptic Package Manager.

Here i am describing how to install flash by using synaptic package manager. Open the synaptic package manager and type 'flash' in the search bar. You will see a list of packages is shown as the results.

 
Select the 'flash-plugin-installer' and mark it for installation. Now click the 'Apply' icon.

Synaptic Manager will now display the list of packages to be installed, description of the sizes of the packages etc. and will ask you whether you would like to install the program. Click 'Apply' now.


Flash player will be installed into your computer now. We can get this confirmed by again opening 'Synaptic' and searching for flash player. This time it will show the green mark on the flash-plugin-installer package which says that you have an existing flash player now.


Friday, January 20, 2012

How to Install Eclipse Indigo 3.7 in Ubutnu 11.10

This is a brief tutorial on how to install Eclipse Indigo IDE 3.7.0 in Ubuntu 10.10. Downloading and installation is straight forward but many users might have difficulties in opening and running eclipse as not setting the JRE/JDK path correctly. Let's see how this can be done.

1. First download the Eclipse IDE (I selected Eclipse IDE for Java EE Developers) from http://www.eclipse.org/downloads/ page. Download either 32 bit or 64 bit version from a suitable mirror from the selection.

2.This will download 'eclipse-jee-indigo-SR1-linux-gtk-x86_64.tar.gz' package into your computer. Extract the package to a location in the hard drive.You will see that 'eclipse' directory is being created after the extraction. 

3.Open 'eclipse' directory and there will be following files and directories. Click the 'eclipse' executable icon. 

Fig.1: contents in the eclipse directory
4.If all the configurations are correct, the IDE will be started by clicking this icon and you can just start coding etc. But in most of the cases it will not start at first time and you will see the following error message. 

"A Java Runtime Environment (JRE) or Java Development Kit (JDK) must be available in order to run Eclipse. No Java virtual machine was found after searching the following locations:[SOME PATH IN YOUR COMPUTER] java in your current PATH" 

Fig.2: JDK or JRE path missing in eclipse

5. This error occurs mainly because of the IDE can't find the correct path to the JDK or JRE in our computer. Therefore we have to explicitly configure the path to JDK or JRE in the IDE configuration file. 'eclipse.ini' is the initialization file which carries out important configurations to run eclipse. This file can be found in our eclipse_home directory (See the figure 1 to identify eclipse.ini file).

6. Open the file in a text editor and add the following lines to the beginning of file. Replace the '/usr/lib/jvm/jdk1.7.0/bin' path with the PATH to JDK_HOME/bin in your local computer. Then save the file.
 -vm
/usr/lib/jvm/jdk1.7.0/bin


7. Now we have configured JAVA path for the Eclipse IDE. Click the 'eclipse' icon back and this time it will start the IDE successfully. Happy coding :)
Fig.3: Eclipse Indigo 3.7.0